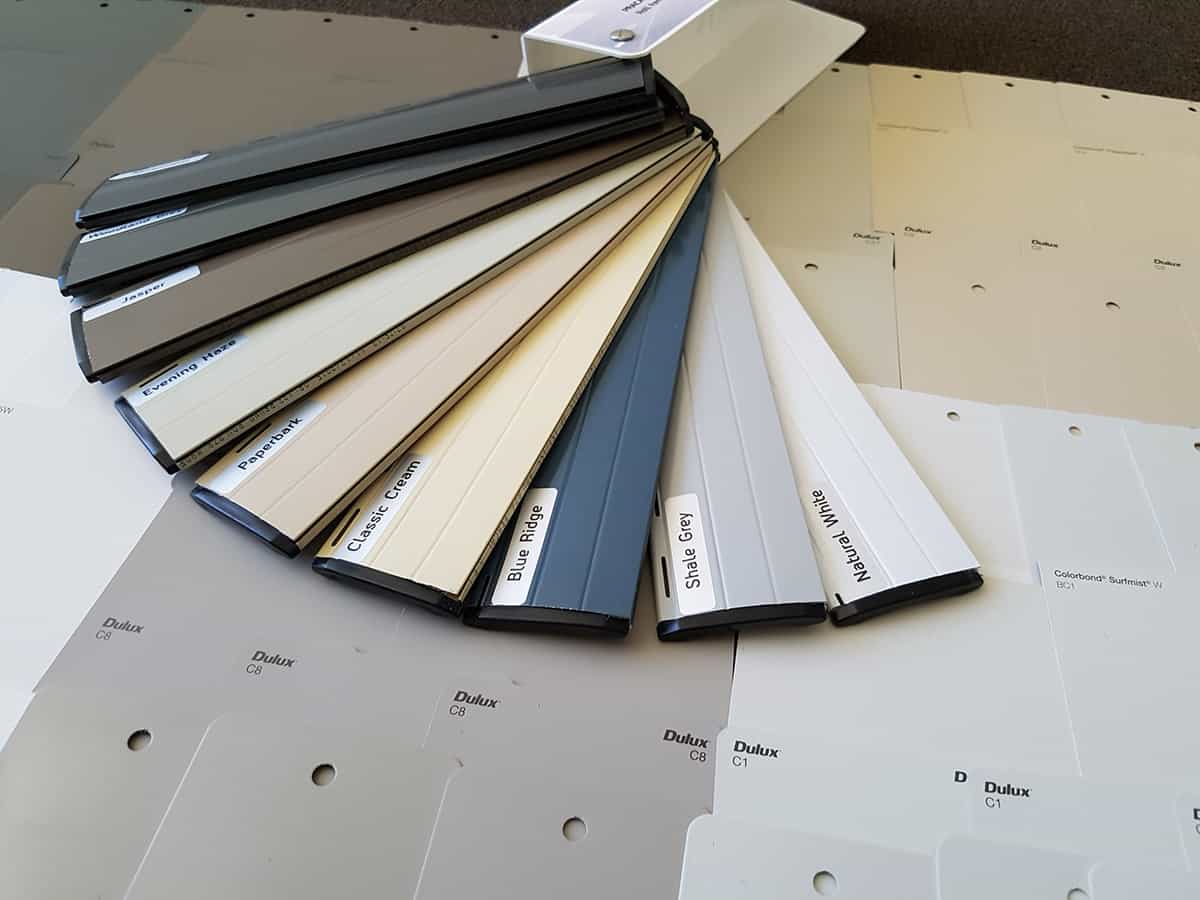
The Ultimate Colour Selection
Finding Faults Before Customers Do
These are meant to be the same colour.
This is a story about an epic adventure. We want to make the world’s best shutter for our customers.
Before you can make a perfect shutter, you need to find the current product’s flaws. Our goal is to find & eliminate problems before a shutter leaves the factory. Usually this means checking for dents, ensuring everything is put together well, shutters are rolled up correctly and sitting right and packaging the shutter very well.
A couple of months ago we received a batch of profile slats that were … not so great. They looked like completely different colours despite being labelled the same on the packaging. Surely this was a mislabelled product, right? These are both supposed to be Classic Cream.
We tested it against other colours and none matched, either. It was a very dark, green-ish colour compared to its counterpart. We’ve pulled a sample of the shutter onto the left over to the right so you can see how drastically different they are. We didn’t want to put the colours on the right on someone’s home when the rest of their Colorbond products are the colour on the left so we rejected these slats and ordered new ones.
This made us wonder – how far off are the rest of our products? Are they all 100% matching except this obvious “bad batch?”
Our three-month journey of finding, sourcing and testing for “the perfect colours” started here.
The Colour Testing Process

After receiving that shutter batch we ordered Colorbond samples to check against. It turned out that the shutter on the left was much closer to the Colorbond sample and the one on the right was off by a lot. We realised “off by a lot” isn’t very scientific so we ordered a colorimeter. This is a testing device that is much more precise than saying the colour just looks wrong. The colorimeter tells us how far it’s off from the original sample and then tells us how it’s off (too green, too blue, too red or too yellow, too dark or too light.)
You can see the colorimeter’s screen to the left. See the ΔE= range? That tells us how much different the colours are from a tested Colorbond sample. In this case, a Shale Grey sample passed with only 0.24 so it was very, very similar. We tested visibly different samples and found that most people can see a ΔE=2 change so we have tightened regulations on our suppliers. This means the shutter, pelmet, siderails & guides should match less than ΔE=2 from our sample to your finished product. It’s very hard to distinguish any differences at that level.
Now, look below the ΔE and you’ll see the White/Black and color scale. In this case the tested Classic Cream was marginally more green than the Colorbond sample and maybe a bit more yellow but very close. The black square marks the passing limit so the red dot is well within the square. Similarly, the test product was slightly darker than the Colorbond sample but again, only very marginally.
Since we received our colorimeter we’ve run more than 1200 tests to confirm our samples match as closely as possible.
For 2017, we are also introducing 5 new colours (adding 4 and changing 1). Those colours will also be tested using this same process to ensure your Colorbond gutters, roof, fencing, fascia and other products will match our shutters as closely as possible.
50 Shades of White
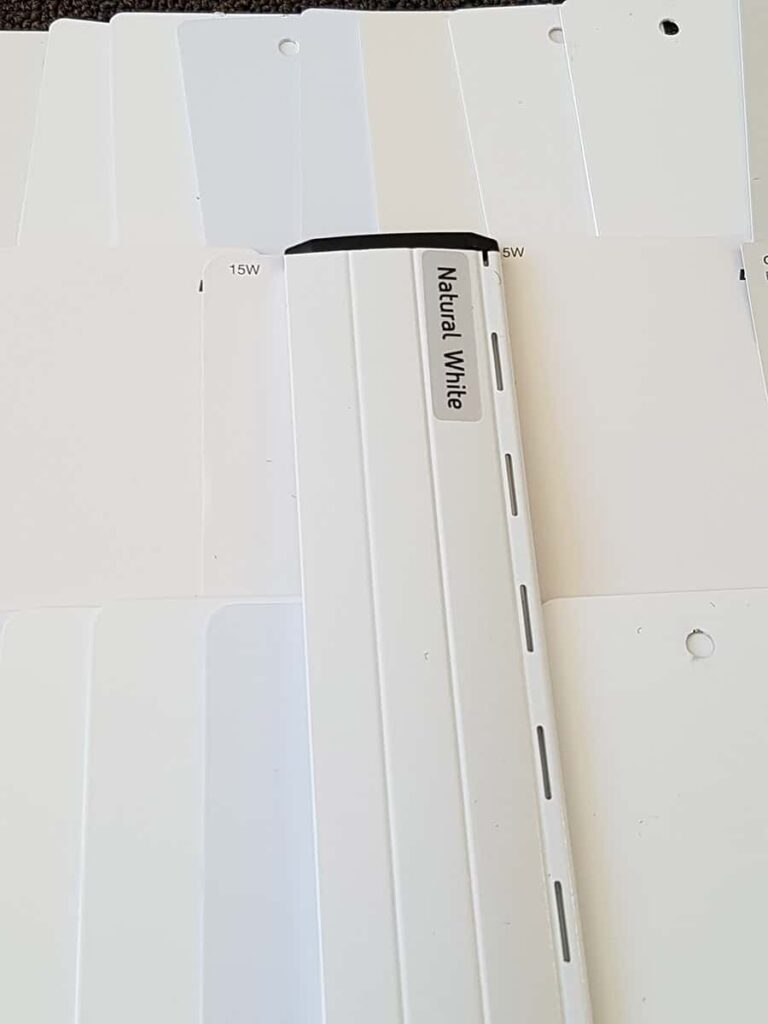
You should be able to see from the image to the right that “white” has many, many meanings. We’ve put a sample of our “Natural White” against other whites to make sense of the many samples we received during our testing.
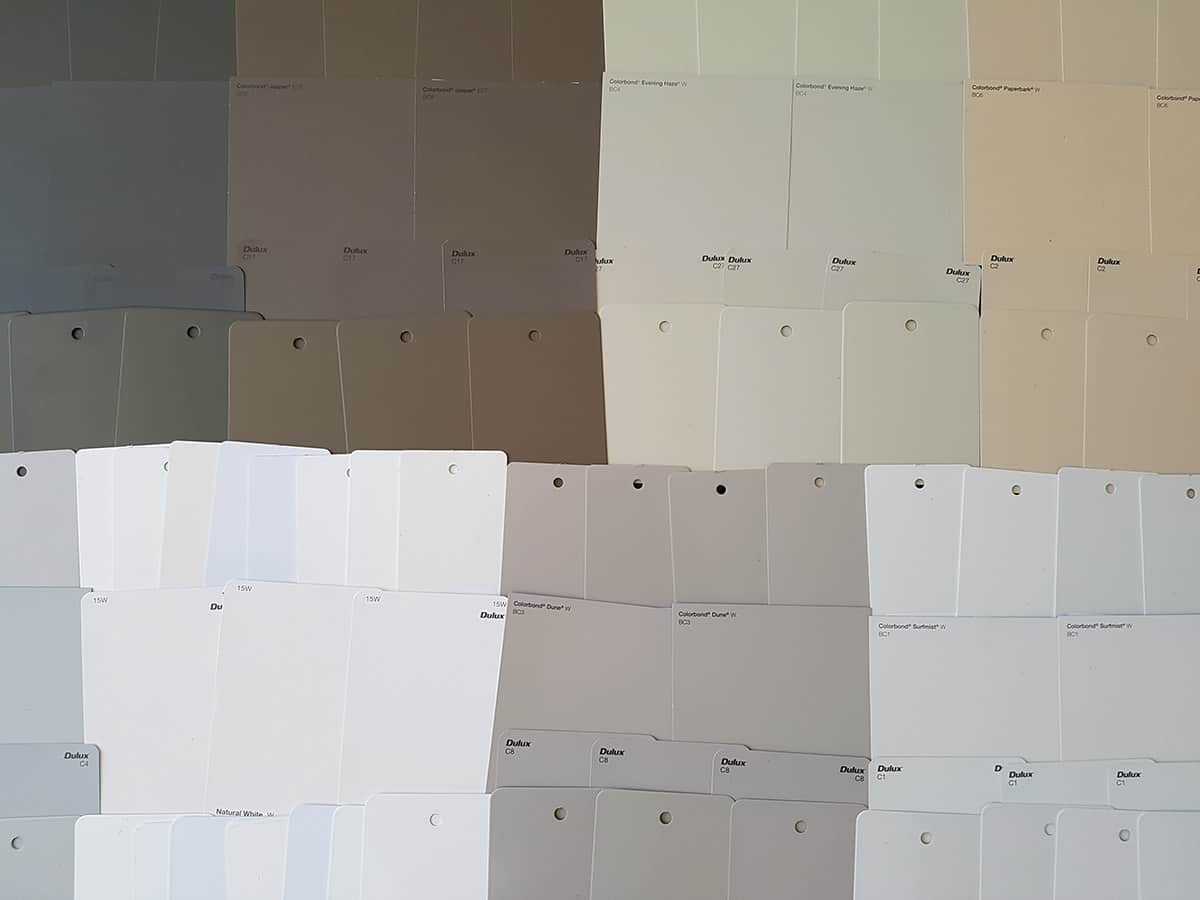
In total we ordered more than 300 total samples of just 12 colours to get an accurate gauge on our colour profiles.
Here we’ve put together around a dozen of each colour to show you the variety of samples we received. Some of the Monument samples actually look blue on this test. They aren’t blue. Monument is a dark, dark grey that is almost black. Why did people send us blue Monument? We’re still not sure.
If you look at the bottom right of this image you can also see one of our new colours, Surfmist. Two are very dark, two are very light … we haven’t offered Surfmist in the past so our production team & installers wouldn’t necessarily know one was “wrong” in this case. Testing showed us which supplier we need to ensure a high quality finished product that matches your home’s Surfmist colour.
The Ultimate Colour Selection
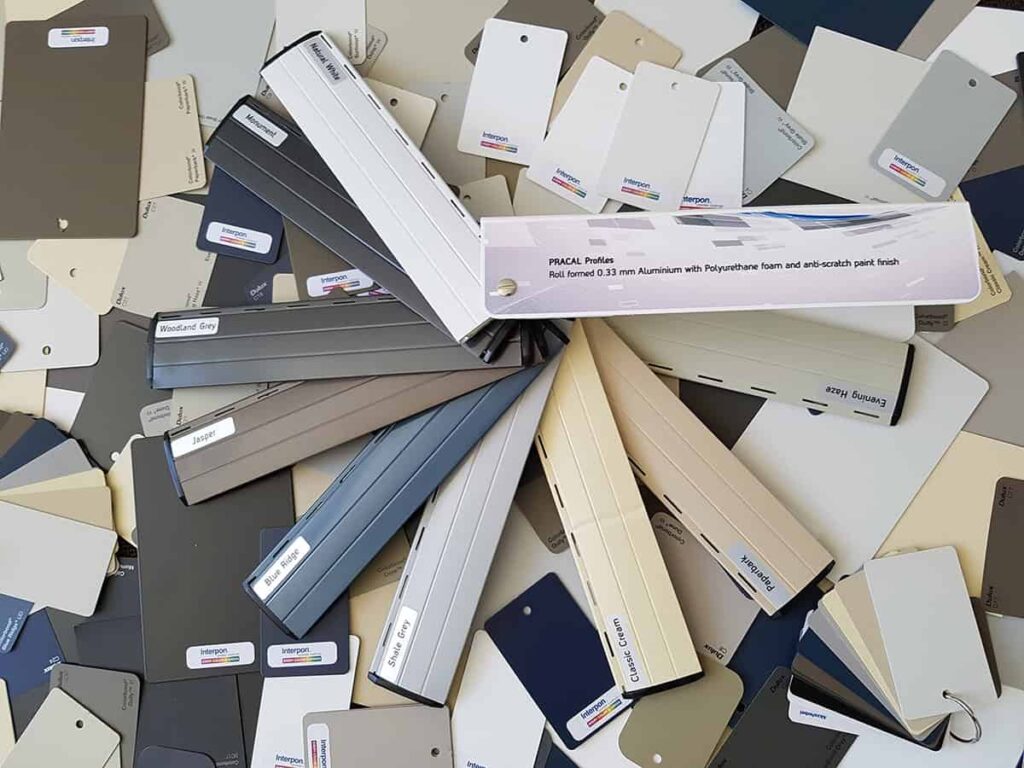
This is just a peek into our world over the last three months:
As you can see, we take the product very seriously and want you to be satisfied with your purchase of installed roller shutters. We are obsessed with creating a better product and know that aesthetics are very important to most of our customers. You can get our roller shutters in beautiful colours all across Australia including:
- Roller Shutters Melbourne
- Roller Shutters Sydney
- Roller shutters Brisbane
- Roller Shutters Adelaide
- Roller Shutters Perth
FIVE New Colours for 2017
Starting early in 2017 we will be debuting four new Colorbond colours (and removing an old one) and changing our Natural White colour. If you’ve looked closely above you can see the new colours.
Our new colours will be: Surfmist, Deep Ocean, Dune and Gully. The colour we’re removing is Blue Ridge. Colorbond no longer carries this colour and it’s a very similar colour to their new & improved Deep Ocean. We are making our white more of a “true white” colour instead of the “off-white” that Natural White has been in the past. Our new Natural White matches our colour range much better and ensures that if you order a white-with-something-else shutter it looks it’s best.
As we walked around display homes last weekend it was apparent that the trends are for browns, tans, creams, beige, grey and black & white to continue for the next few years. We’ve filled a few gaps in our colour range to ensure we can match the most popular Colorbond colours. Our research on forums, such as HomeOne, and Google trends also gave us an indication that Dune & Surfmist are especially current colours and will likely be very popular in the new year for our customers.
Share:


Subscribe to the blog
Subscribe